Monday, September 24, 2012

Chevron Rocking Chair Revised

How to Re-Do a Rocking Chair


I purchased this oversized rocking chair at a garage sale for $5. It was wobbly, chipped, and the seat was awful, not very inviting. 
This blog will show you how to replace an ugly rattan/wicker seat in an otherwise good chair. 

Not only was the seat coming apart but it was cracking and chipped. 

First order of business was to sand off as much chipped paint as possible. This Ryobi hand sander is great for projects like this. I use 120 grit sandpaper.

As you can see the paint is easily sanded off. 


Next, it's time to cut out the rotted stinky gross wicker. Enter handsaw. 

Looking better already

After all the wicker is removed you will discover a wooden frame where the seat it, remove this and save for later. 

When I tried to remove the wooden frame, the arm rests were in the way. Just look for a screw where the arm rest is attached, remove, and save for later. 

Also, turn the chair up-side-down and remove the screws holding the seat frame in place. Save for later. 

Once you remove the arm rests, the seat frame easily pops out. 

Now, trace the seat frame onto a piece of particle board. One that will be thick enough (1/2 inch) to use as a seat. You can toss the seat frame out once you've traced onto new seat.

Now the chair is ready for a primer, a favorite trick of mine is to go to the Home Depot paint department and check out the discounted paint. These items were usually a mistake or a return that they mark down dramatically. Sometime the colors are funky but I got this pale blue paint + primer sample for .50 cents. It was enough paint to coat the chair twice with primer. 
While I live in Phoenix and it's too hot to re-finish furniture outside, I get the majority of my projects done at night in my family room. I use an old sheet for a drop cloth. I painted the chair with Behr Premium Gloss in Ultra Bright White.
After you cut the wood out you need to get foam or stuffing to create a soft seat. 

In this case I found an old goose down pillow that seemed to be about the right size. 


lay the fabric you choose over the pillow to make sure the design is where you want it. This fabric is from Hobby Lobby (they have the best selection in Scottsdale) Plus you can show them an email in your phone for a 40% off coupon. 

Now it's time to get the staple gun out. These were scary at first but now I love using it!

Staple the fabric in place making sure to pull tightly. 

Gather the corners as neat as you can. 

After the first round of staples I always do a second round making sure to get as many staples as possible. The cushion can look sloppy if there are any gaps. 

After you paint and make the cusion you are ready to put all in place. Use a screw gun to return the screws the secure the chair. 

Voila! A 5$ garage sale chair can look new again!!!!!


Thank you for reading

Tuesday, September 18, 2012

Epoxy Resin Furniture Chevron


How to use resin/epoxy on furniture:


I Purchased this table from a local garage sale for $2. It was red, chipped and on its last leg. (sorry, don't have a before pic) First, I sanded the table and re-enforced the legs with a screw directly on top of the table, I knew that I would be covering it up with fabric. Paint with a primer and then a color. 


Next measure and cut the fabric you are going to use to cover the table. Paint a layer of Mod Podge and then lay the fabric on top allowing it to dry. This will ensure that your fabric will stay put when coating it with resin. I have seen other DIY-ers coat the fabric with Mod Podge and don't give it the resin coat. In this case the table had a dip in the wood and I wanted to even it out so drinks didn't spill when I used it. 


Mod Podge is great for furniture projects. 


After the mod podge dries, the last step is to epoxy the table. 

I purchased this kit from Home Depot, follow the instructions making sure to only work on your project in a ventilated area. The epoxy/resin has a powerful chemical smell. It's also important to let the project dry in a clean, bug and dust free area. It takes 24 hours to dry and if a fly lands in your epoxy, it may ruin the project. In the picture above you can see a dog hair landed and will forever be in the epoxy coat.

Something else to note, Because I chose a grey and white duck cloth fabric, the paint shows through the fabric after the epoxy was added. I couldn't tell this was the case with just the Mod Podge layer. Make sure that if you are using a light colored fabric to paint the area you are covering carefully. Because I happen to like the effect of the under paint has on the table, I don't mind, but I would be upset if I was surprised with this after all my hard work.

Thanks for reading!

Wednesday, September 12, 2012

Martha Stewart Textured Metallic Paint


Martha Stewart Textured Metallic Paint


I was so excited to Martha Stewart Textured Metallic Paint in Lampblack, I thought it would make a cool finish on a vintage piece of furniture

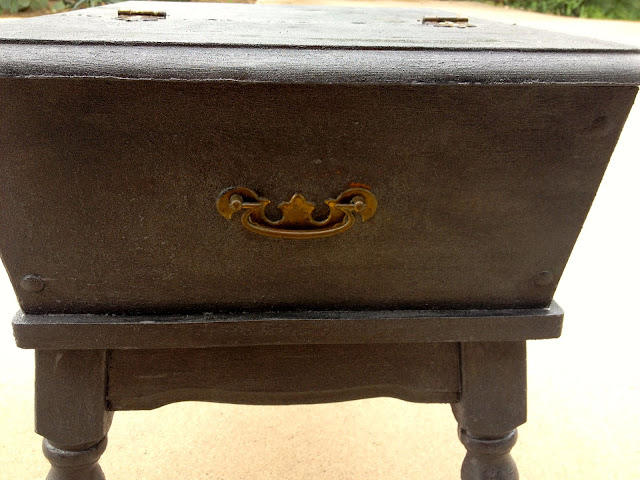
The piece pictured was purchased at a garage sale for 5$ and was taken after I used my Ryobi hand sander to remove old paint. 

I used the primer/sealer that was recommended with the paint to prime and seal

I wouldn't recommend using the Martha Stewart primer on top of the Lampblack Metallic Paint, it leaves thick coat and looks odd. 

As you can see the paint is very thick and the brush stroke are next to impossible to hide

If you were thinking about trying the MS  textured metallic paint, DON'T I can't even imagine what this thick gloppy paint would look good on....maybe a flower pot but that's about it. Save your $$$$


Martha Stewart Textured Metallic Paint is the worst and I wouldn't recommend using it!

Tuesday, September 11, 2012

How Not to Use Martha Stewart Glitter Paint


What not to do when using the Martha Stewart Glitter Paint


If you are like me than you have wandered down the Marta Stewart paint section at Home Depot and ran into the Amazing-ly fun specialty paints Martha Stewart has. The Glitter purple finish immediately caught my eye!

I found this sweet little table at a local garage sale for $4 bucks. It was white and was pretty plain (sorry I don't have a before picture but just try to imagine).

This was my first time using the MS glitter paint so I used the primer/sealer specialty finish that is supposed to go with the glitter paint.

After the "primer" dried, I started coating the white furniture piece with the glitter paint. To my dismay I discovered that the paint was actually clear with purple glitter.

Determined to have a sparkly glitter-y piece of furniture I kept coating this piece. Literally 12 times I kept coating and coating the white piece until it started to actually look purple. I had to make a second trip to Home Depot to buy more purple glitter paint, I had already come so far I wasn't going to stop now.


In the end it turned out with the desired affect I was looking for but I spent three times what it should have cost to decorate this silly piece of furniture.

But, even though this piece had months to dry, it still hasn't you can't set anything heavy on the dresser even still!

I wish I would have read these blogs before I wasted so much time and money:


http://builditsewitloveit.blogspot.com/2012/01/diy-glitter-paint.html

http://www.ehow.com/way_5391011_adding-glitter-paint.html


http://www.youtube.com/watch?v=6ortBPokqF8

I just SOLD the night stand / side table today for $35

 The color turned out beautiful but never fully dried.

 I found this drawer liner at the Dollar Tree, I always love putting a drawer liner in all of my projects
 The original dresser had a two prong handle, I filled the two holes in with wood filler and painted over them. If you look very closely you can tell but it's very hard. The cute pink knob came from target. They cost about $1.25 a piece. 

I painted the sides of the drawer in a glossy black. 

Thursday, September 6, 2012

Martha Stewart Precious Metals Specialty Paint/Finish in Mirror

The coolest paint on the market is the Martha Stewart Precious Metals Paint, this project used the color  "Mirror" in the precious metals line, so fun!
So I was garage sailing one Saturday morning when I came across an interesting multi-family garage sale. This chair was in a random corner with a bunch of stuff piled on top. I wasn't sure if it was for sale and was pleased to find out it was $4.

It seemed to be a nice looking chair but the wicker on the seat was all rotted through. Sorry, not pictured here. 

I could tell a custom painted piece but not well cared for. However, the chair was sturdy and not wobbly which is very important when spotting a candidate to re-vamp. 

First, I cut the rotted wicker seating out of the bottom. Next, I cut a 1/2 thick piece of plywood (with a handsaw)  to serve as the new seat. I envisioned this chair for my sewing craft room. Next, I picked out a foam cushion and fabric and upholstered the newly made seat with a staple gun. 
Before screwing the seat onto the chair (screws can always be found underneath any chair to secure the seat cushion) I sanded the chair down with my Ryobi sander. Hand Sanders are  like $30 and it saves so much time, not to mention your manicure. 

I liked the paint pattern that was on the chair previously but wanted to make the chair silver and black and give it amore chic look instead of french country.

Oh, BTW always look for clues of a well built piece of furniture. By looking underneath the chair I found this custom metal plaque. This tells you that it's a quality craftsmanship and isn't going to fall apart. 

The opening in the chair was perfect for a piece of an old chandelier jewel. I hand turned the round screw into the wood after drilling a tiny hole.

Before I screwed down the newly upholstered seat, I hot glued this cording on the wood.

I haven't experimented with the shabby chic look yet; i.e. the chipped paint and perfectly distressed style.  I tend to like higher gloss paint. Especially for a chair that will "worn and torn" I used Behr premium plus hi-glass pure black. 

I purchased this canvas from Hobby Lobby with a coupon. They'll take an email coupon from your smart phone, 40% off makes a big difference!

I left TRACY's name and copyright on the chair for good measure. It's tiny so you don't notice it.

Thanks for reading :)