Saturday, October 27, 2012

Striped and Checkered China Cabinet

I'm sure my lack of before pictures make reading this a little less interesting, but I have been re-doing furniture for 6 years now and have only most recently started to share my projects.

Let's just say that this china cabinet was a poorly cared for piece with water damage and I bought it for 8$.

The original piece had doors covering the two bottom shelves. I tried to make them work but how else could I display all my knick knacks and pictures?

The item inside the crystal ice bucket on the bottom left is my broach bouquet I made for my wedding. So worth the money and DIY time. Maybe someday I'll post about how I made that. Here is a great tutorial that I used: DIY Broach Bouquet

As you can see here one of these drawers is not like the others. The wood work was missing, I considered ordering all new overlays from myoverlays.com but then figured that if I was trying to re-sell I wanted to keep my costs down. I decided on a MacKenzie Childs Inspired checkered pattern. 

I took the original hardware off and hand painted it with Martha Stewart Metallic in Thundercloud. I also turned it up-sidedown to give a different look. 

Originally I left it with just two different silver colors. But I was bored and wasn't proud of my piece. 


I used the frog tape to do the edges but in the future I would probably just try and free hand. It didn't work so well on this piece because of the texture. 

I changed the backsplash from Thundercloud to a gloss black to give the piece more contrast. 

Now it's got a POP!

I accented the different areas of wood work!

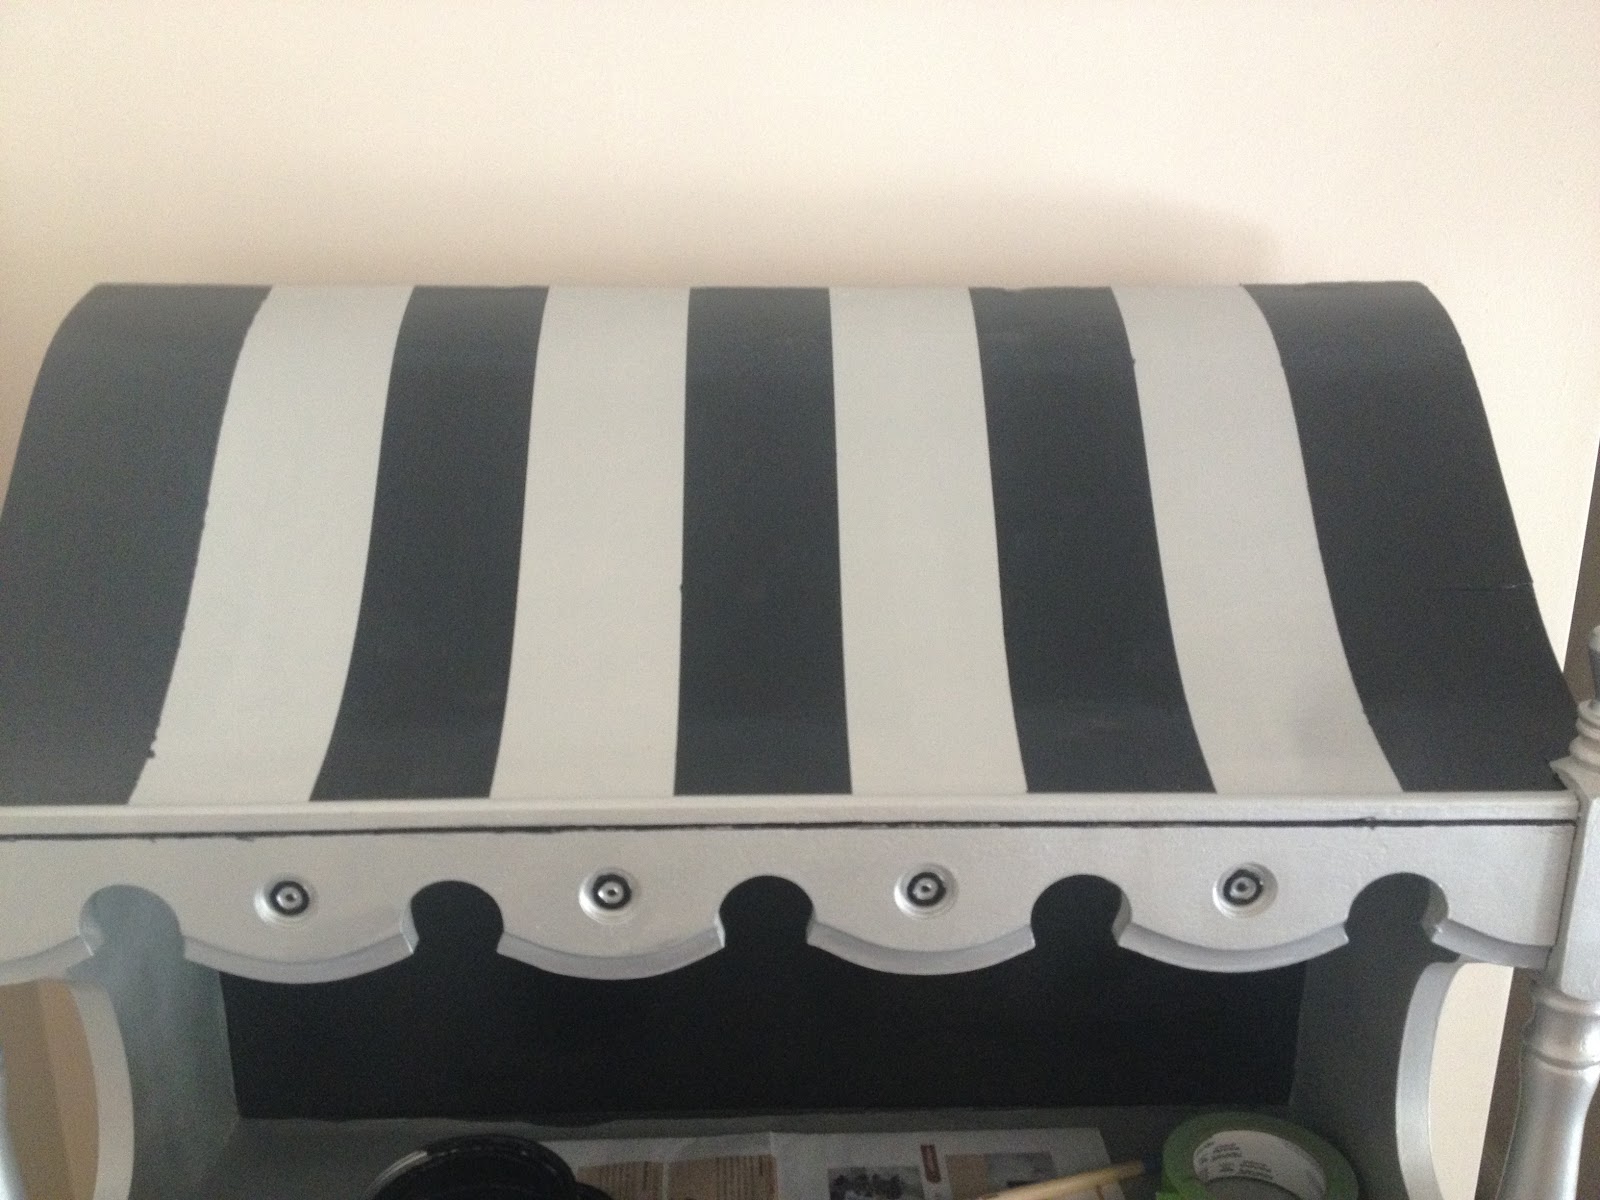
Since the top of this piece reminded me of an awning on a little french shop I thought I would paint it as one. Measure the piece and tape off the different sections so the stripes are the same size. The two stripes on the ends were skinniest. 


Still wasn't what I'd pictured.....

So I painted the silver on the top with a light white wash coat. 

TaDA!

To paint a checkered pattern. Tape off the area and label.


Mackenzie Childs inspiration

Pinterest Inspiration. Follow me http://pinterest.com/laurenforster/
Cute silver furniture at Z-Gallerie that inspired me!

Monday, September 24, 2012

Chevron Rocking Chair Revised

How to Re-Do a Rocking Chair


I purchased this oversized rocking chair at a garage sale for $5. It was wobbly, chipped, and the seat was awful, not very inviting. 
This blog will show you how to replace an ugly rattan/wicker seat in an otherwise good chair. 

Not only was the seat coming apart but it was cracking and chipped. 

First order of business was to sand off as much chipped paint as possible. This Ryobi hand sander is great for projects like this. I use 120 grit sandpaper.

As you can see the paint is easily sanded off. 


Next, it's time to cut out the rotted stinky gross wicker. Enter handsaw. 

Looking better already

After all the wicker is removed you will discover a wooden frame where the seat it, remove this and save for later. 

When I tried to remove the wooden frame, the arm rests were in the way. Just look for a screw where the arm rest is attached, remove, and save for later. 

Also, turn the chair up-side-down and remove the screws holding the seat frame in place. Save for later. 

Once you remove the arm rests, the seat frame easily pops out. 

Now, trace the seat frame onto a piece of particle board. One that will be thick enough (1/2 inch) to use as a seat. You can toss the seat frame out once you've traced onto new seat.

Now the chair is ready for a primer, a favorite trick of mine is to go to the Home Depot paint department and check out the discounted paint. These items were usually a mistake or a return that they mark down dramatically. Sometime the colors are funky but I got this pale blue paint + primer sample for .50 cents. It was enough paint to coat the chair twice with primer. 
While I live in Phoenix and it's too hot to re-finish furniture outside, I get the majority of my projects done at night in my family room. I use an old sheet for a drop cloth. I painted the chair with Behr Premium Gloss in Ultra Bright White.
After you cut the wood out you need to get foam or stuffing to create a soft seat. 

In this case I found an old goose down pillow that seemed to be about the right size. 


lay the fabric you choose over the pillow to make sure the design is where you want it. This fabric is from Hobby Lobby (they have the best selection in Scottsdale) Plus you can show them an email in your phone for a 40% off coupon. 

Now it's time to get the staple gun out. These were scary at first but now I love using it!

Staple the fabric in place making sure to pull tightly. 

Gather the corners as neat as you can. 

After the first round of staples I always do a second round making sure to get as many staples as possible. The cushion can look sloppy if there are any gaps. 

After you paint and make the cusion you are ready to put all in place. Use a screw gun to return the screws the secure the chair. 

Voila! A 5$ garage sale chair can look new again!!!!!


Thank you for reading

Tuesday, September 18, 2012

Epoxy Resin Furniture Chevron


How to use resin/epoxy on furniture:


I Purchased this table from a local garage sale for $2. It was red, chipped and on its last leg. (sorry, don't have a before pic) First, I sanded the table and re-enforced the legs with a screw directly on top of the table, I knew that I would be covering it up with fabric. Paint with a primer and then a color. 


Next measure and cut the fabric you are going to use to cover the table. Paint a layer of Mod Podge and then lay the fabric on top allowing it to dry. This will ensure that your fabric will stay put when coating it with resin. I have seen other DIY-ers coat the fabric with Mod Podge and don't give it the resin coat. In this case the table had a dip in the wood and I wanted to even it out so drinks didn't spill when I used it. 


Mod Podge is great for furniture projects. 


After the mod podge dries, the last step is to epoxy the table. 

I purchased this kit from Home Depot, follow the instructions making sure to only work on your project in a ventilated area. The epoxy/resin has a powerful chemical smell. It's also important to let the project dry in a clean, bug and dust free area. It takes 24 hours to dry and if a fly lands in your epoxy, it may ruin the project. In the picture above you can see a dog hair landed and will forever be in the epoxy coat.

Something else to note, Because I chose a grey and white duck cloth fabric, the paint shows through the fabric after the epoxy was added. I couldn't tell this was the case with just the Mod Podge layer. Make sure that if you are using a light colored fabric to paint the area you are covering carefully. Because I happen to like the effect of the under paint has on the table, I don't mind, but I would be upset if I was surprised with this after all my hard work.

Thanks for reading!